Petit Lemon Daisy Cake

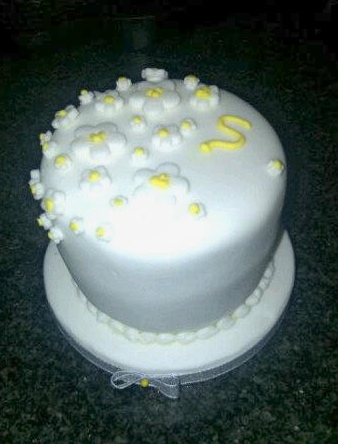
4″ iced lemon cake with lemon curd and buttercream filling. This is great gift size cake, petit I like to call it. They are becoming more and more popular. This particular one was done for my friend Lauren for her mothers birthday and was decorated with white sugar paste, white & yellow daisies and personalised initial detail in royal icing.

I always get the most comments about lemon cakes. They are delicious.

Star Wars Millenium Falcon Cake

Its the cake that puts the fear of dread into most cake makers. Normally the conversation goes like this…..

Friend: ‘Will you make the cake for my/{insert loved one here}’s  birthday cake?’

Me: Sure, what are you looking for?

Friend ‘The Millenium Falcon’

My Head: Argghhhh!

Me: Of course!

My Head: Oh my god – this cake is going to look like something you would see on cakewrecks.com

Well, it turned out pretty well as it goes. Although, it felt more like a piece of engineering at times more than baking. Here’s how I did it:
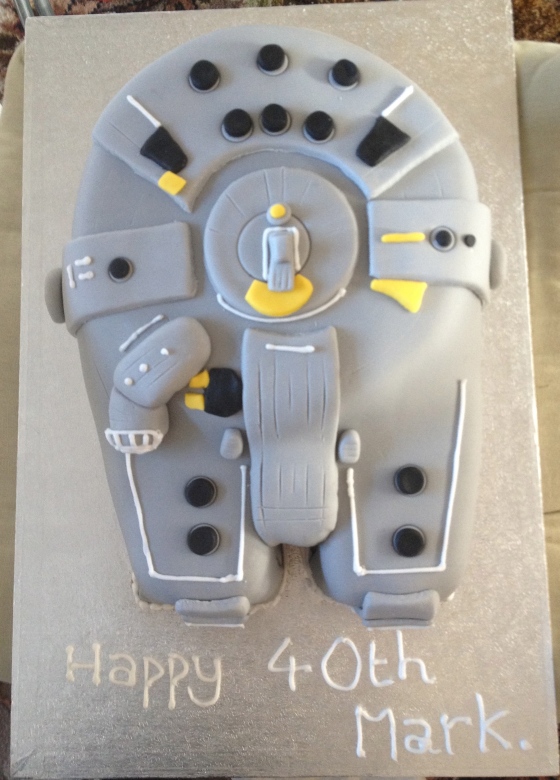
Make up enough cake batter to fill an 8″ round deep tin and a standard loaf tin.  The cake baked in the loaf tin will be used to cut out the front sections of the millenium falcon and it only needs to be about 2″ when baked rather than the 3″ of your round cake.

One baked and cooled, split the round cake and fill with butter cream and jam if required.  I made a chocolate cake for this one so it was filled with chocolate buttercream. Place the round cake off centre on a large rectangular cake board. Now use a bread knife and cut out two 3″ x 2.5″ rectangles from your loaf tin cake. Trim one side of each at an angle to make them wider at the top (this end will be attached to your round cake) and sloping down to a narrower end. Also cut a small 1″ square from the loaf tin cake which will be placed in between to two ends. Arrange them all on the board.  Feel free to use any left over bits of cake from the loaf tin to fill in any gaps and improve your shape.

Once your happy with the basic shape you need to crumb crust the cake with buttercream to cement it all together and give you a nice smooth base before going anywhere near it with your sugar paste.  So, slather it in butter cream and smooth it over with a palate knife, ensuring all gaps are filled and you have a good solid shape all over, right down to the board. Clean off any excess on the board with some kitchen roll.

Refridgerate for at least an hour, preferably overnight.

Remove from the fridge and start to prepare your sugar paste. You will need approx 1.5 kg of grey sugar paste and small amounts of black and yellow. Roll out about 1.2 kg of the grey to approx 1/4 inch thick and lay over the cake.  Gently smooth it round all the edges.  When you reach the two ends, I found it easier to cut a slit in between them with a knife to ease the sugar paste round these tricky parts. Smooth over the whole cake with an icing smoother or some sugar paste wrapped in cling film. Trim all the way round the cake.

Roll out the rest of the grey sugar paste and cut out a small circle for the middle, a larger semi circle which you can trim for the back of the ship, three 1″ wide long strips and any other bits you want to add on. You can either follow my picture or there are tonnes of pictures of the millennium falcon online so go as detailed as you want!

Roll out your yellow and black and cut out your other detail.

Pipe round the edge of the cake and add your final touches with piped white royal icing and score knife makes for extra detailing.

Country Rose Birthday Cake

I made this cake for my daughter’s 8th birthday yesterday and she thought it was wonderful.  Inspired by our rather large and growing collection of Cath Kidston wares this cake is pretty colourful and surprisingly easy to do. I wanted to do some more pics and close ups but it seemed to have been devoured by friends and family before I had the chance to take any! Extra chocolately sponge and butter cream centre topped with pink sugar paste and hand rolled roses. This would be perfect for any girls birthday – young or old!

8″ round chocolate sponge (made in 3″ deep tin or two sandwich tins. (I will post some basic sponge and fruit recipes in the next few days)

For butter icing:

6oz butter

4oz cocoa powder

8oz icing sugar

1kg of sugar paste to cover

100g of pink flower paste

50g green sugarpaste

Small amount of Royal icing to stick on roses.

8″ and 10″ cake boards

Ribbon ( 1cm width)

Once the sponge(s) have been made and cooled, make up the buttercream by combining the icing sugar, butter and cocoa with a hand whisk. If you have made a 3″ deep cake then split it with a bread knife.  You can buy a cake wire but a bread knife gives you more control in my opinion. Spread a nice thick layer of the butter cream and sandwich the cakes together. Smear a little butter cream on the 8″ board and place the cake on top. Now cover the entire cake with the rest of the butter cream and smooth it out with a plastic cake smoother until the sides and top of the cake are as straight and flat as you can get them. Place in the fridge overnight if possible.  I can’t stress how essential this step is if you want a smooth, even cake when it comes to covering with sugar paste as it gives you a great base.  If your cake isn’t flat and even at this stage then it never will be no matter how well you cover it!

Now your cake has cooled and the butter cream set in the fridge over night you have got an easier cake to work with which is already on the 8″ board so much easier to handle.  Roll out 250g of your pink sugar paste to approx 5mm and cover your 10″ board. Use a knife to trim the edge and smooth with a cake smoother which you can pick up from your local cake supplier (well worth it). Now roll the rest of the pink sugar paste to approx 7-8mm thick and smooth over your cake.  Trim the excess (I will do some posts with pics just on applying sugar paste soon). You now should have an iced 10″ board and the 8″ cake iced encasing the 8″ board it was on.  Smear a little royal icing in the middle of the 10″ board and place the cake on top.

Okay, now the fun bit – the roses. Rub a little trex or fat on a smooth clean surface.  I have used flower paste for my flowers – it’s easier to manipulate and dries quicker.  It can also be rolled very thin if you are ever making more realistic flowers. If you can only get hold of white flower paste, just mix it 50/50 with some sugar paste in the desired colour. Take a small pea sized ball of the flower paste and roll in your fingers into a fairly thin sausage shape.  Press down on this with your thumb so you get a strip of thin flower paste about 1cm x 4cm. curl the end of the right end and keep going until the flower paste has coiled up to give the rose shape. For the leaves just use slightly smaller balls of green sugar paste, flatten the ball then pinch one end into a leaf shape. You’ll need 42 roses and 42 petals to cover the cake. Leave to harden.

Arrange the roses in groups of three around the cake and add the leaves in between using small amounts of piped royal icing to stick them on. I have added a row of piped pearls round the base of the cake and small piped pearls in between each bunch of roses.  Finish with ribbon round the base board.